
Modifying Cyclonis Backup's Settings
Cyclonis Backup offers a great deal of flexibility via its Settings. To access them, click the Settings button in the Cyclonis Backup main window. This opens a new window with several tabs that allow you to manage your account and customize Cyclonis Backup's various settings.
- The Account Tab
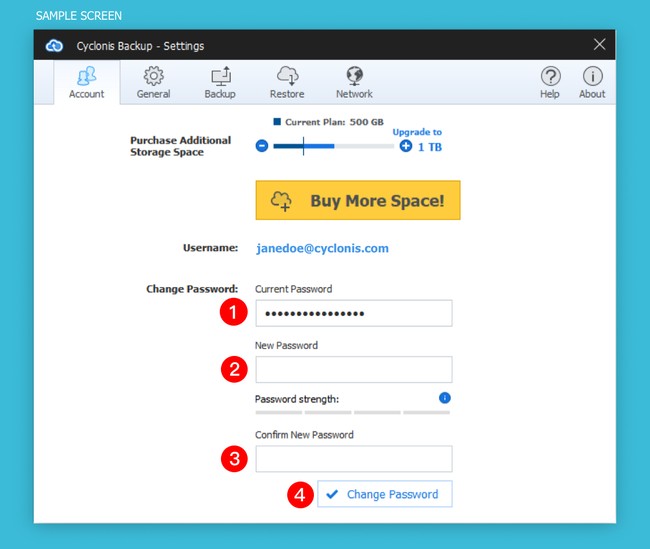
The Account tab displays the amount of space your current Cyclonis Backup plan offers and allows you to upgrade your plan.
You can use the "+" and "-" buttons to select a plan with your desired amount of space. The total storage of the selected plan will be displayed at the right. Once you have made your selection, click the Buy More Space! button to be directed to our purchase page and complete your purchase.
NOTE: You do not have the option of downgrading your subscription plan (i.e. if your current plan gives you 1TB of storage space, you can’t downgrade to 500GB).
The Account tab also gives you the option of changing your Cyclonis Backup password. To update your Cyclonis Backup password, enter your current password (1), enter the new password (2), and then re-enter your new password to confirm it (3). Clicking Change Password completes the process (4). NOTE: If you change your password, you will need to enter the new password on your other devices in order to login to Cyclonis Backup.
NOTE: Your password must be between 6 and 50 characters long, and the password strength meter visible on this screen provides an estimate of the complexity of your password. Although there are no requirements for the type of characters you need to use for your password, we encourage you to protect your Cyclonis Backup account with a strong, unique password.
- The General Tab
The General Tab contains two sub-menus through which you can modify some of Cyclonis Backup's settings.
- The Updates and Startup menu lets you customize how Cyclonis Backup handles updates as well as its behavior on system startup.
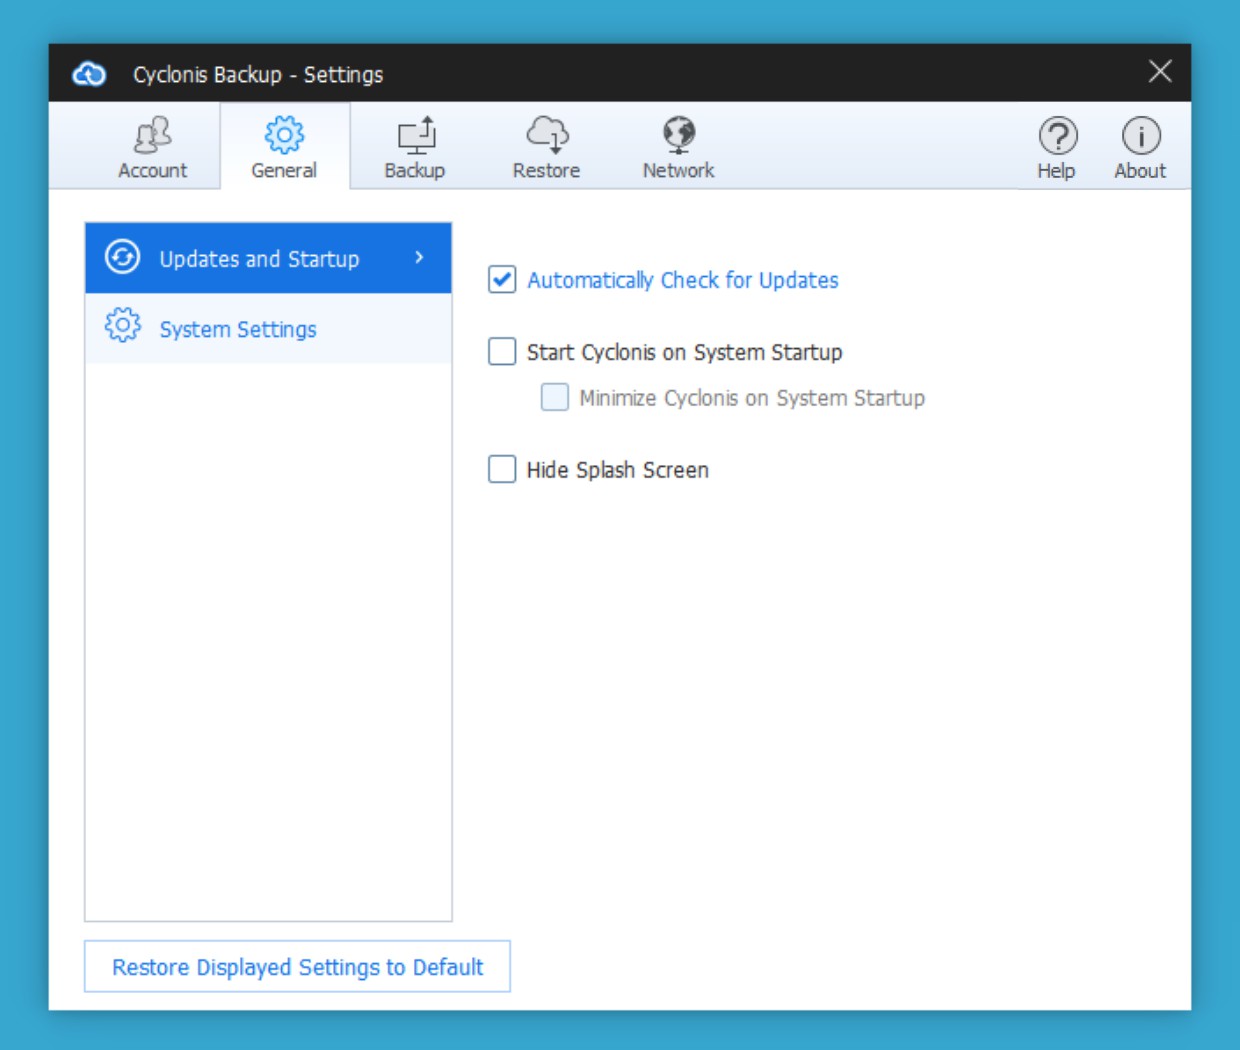
If the Automatically Check for Updates checkbox is checked, Cyclonis Backup will automatically check for program updates when it launches and periodically as it runs. You will be prompted to install any available updates. For your convenience, this option is enabled by default. We encourage you to leave this option selected to ensure that Cyclonis Backup remains up-to-date on your computer.
If the Start Cyclonis on system startup checkbox is checked, Cyclonis Backup will automatically launch when your system boots. For your convenience, this option is enabled by default. When this option is enabled, you also have the option of enabling the Minimize Cyclonis on system startup checkbox. If selected, Cyclonis Backup will be minimized to the system tray when it starts up. To open the interface, just double-click the Cyclonis Backup icon in the system tray.
If the Hide splash screen checkbox is checked, the Cyclonis Backup splash screen will not be displayed at launch.
Clicking the Restore Displayed Settings to Default button will revert all settings in the General > Updates and Startup section to their default values.
- The System Settings menu in the General tab allows you to configure settings related to Cyclonis Backup's appearance and language. It also provides a convenient location where you can verify your version of Cyclonis Backup and manually check for available program updates.
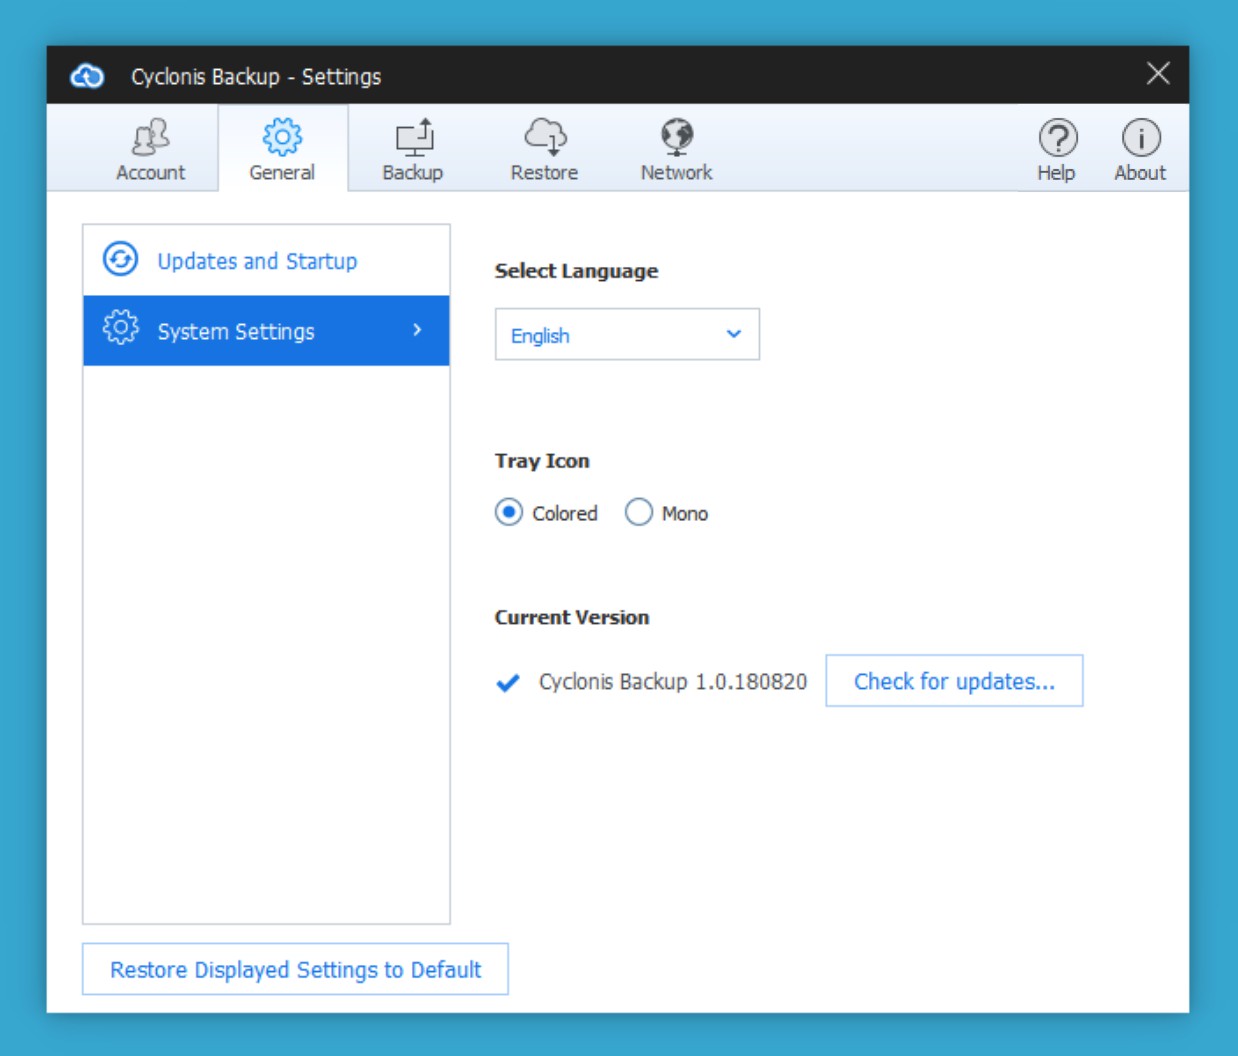
The Select language drop-down menu lets you change the language of the Cyclonis Backup application.
Below the Select language drop-down, you can change the appearance of Cyclonis Backup's Tray Icon
You have two choices:
- Colored
- Mono
By default, the Colored option is selected for the Windows version, and Mono is selected for the macOS version.
This screen also displays the version of the Cyclonis Backup application that you are currently running. You can click the Check for updates... button to check if a newer version is available. If an update is available, you will be prompted to install it.
Clicking the Restore Displayed Settings to Default button will revert all settings in the General > System Settings section to their default values.
- The Backup Tab
The Backup tab lets you customize settings related to backup tasks.
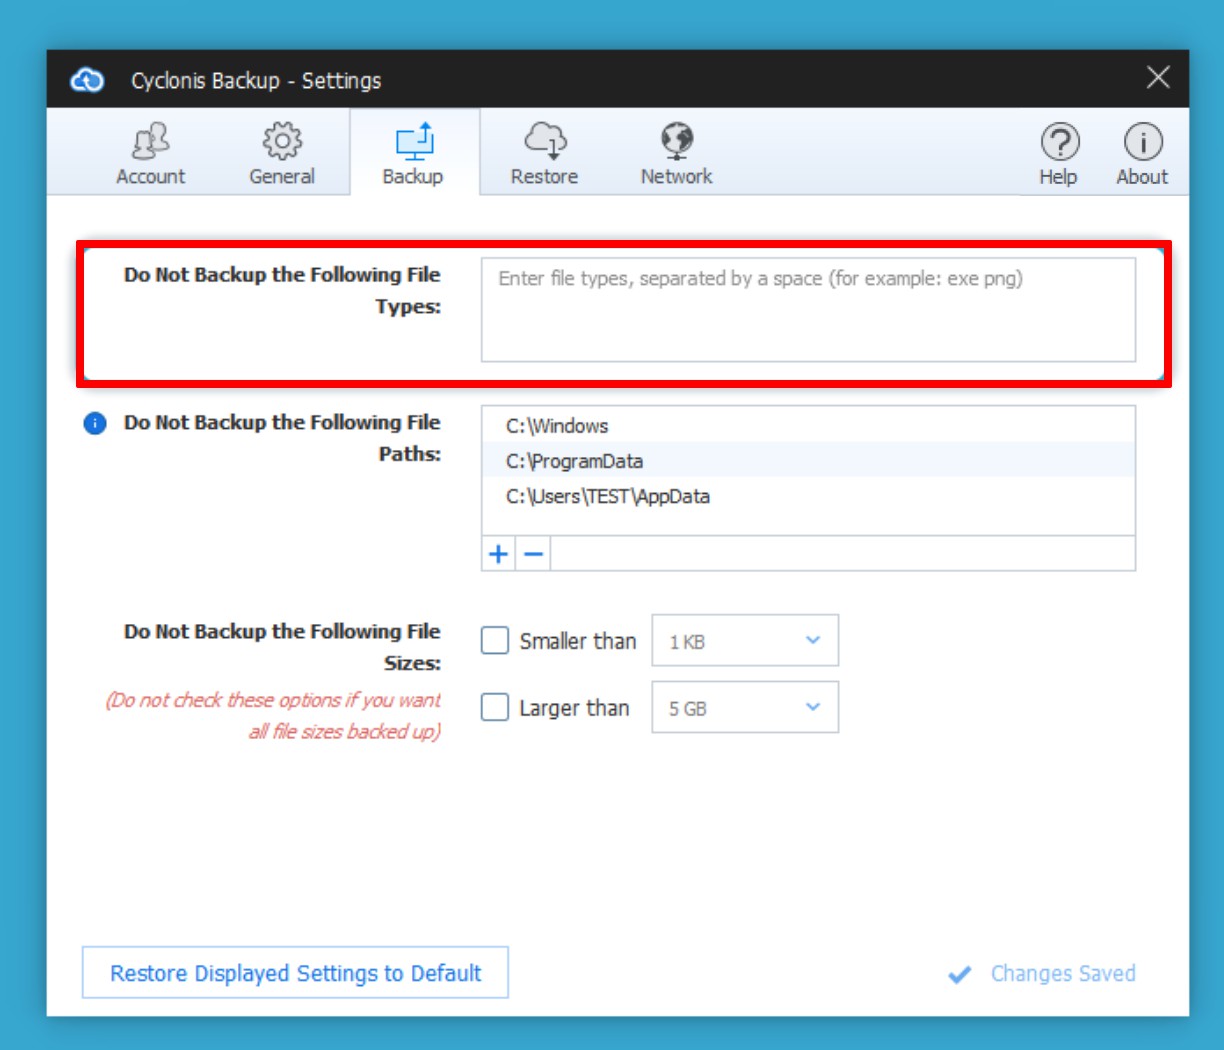
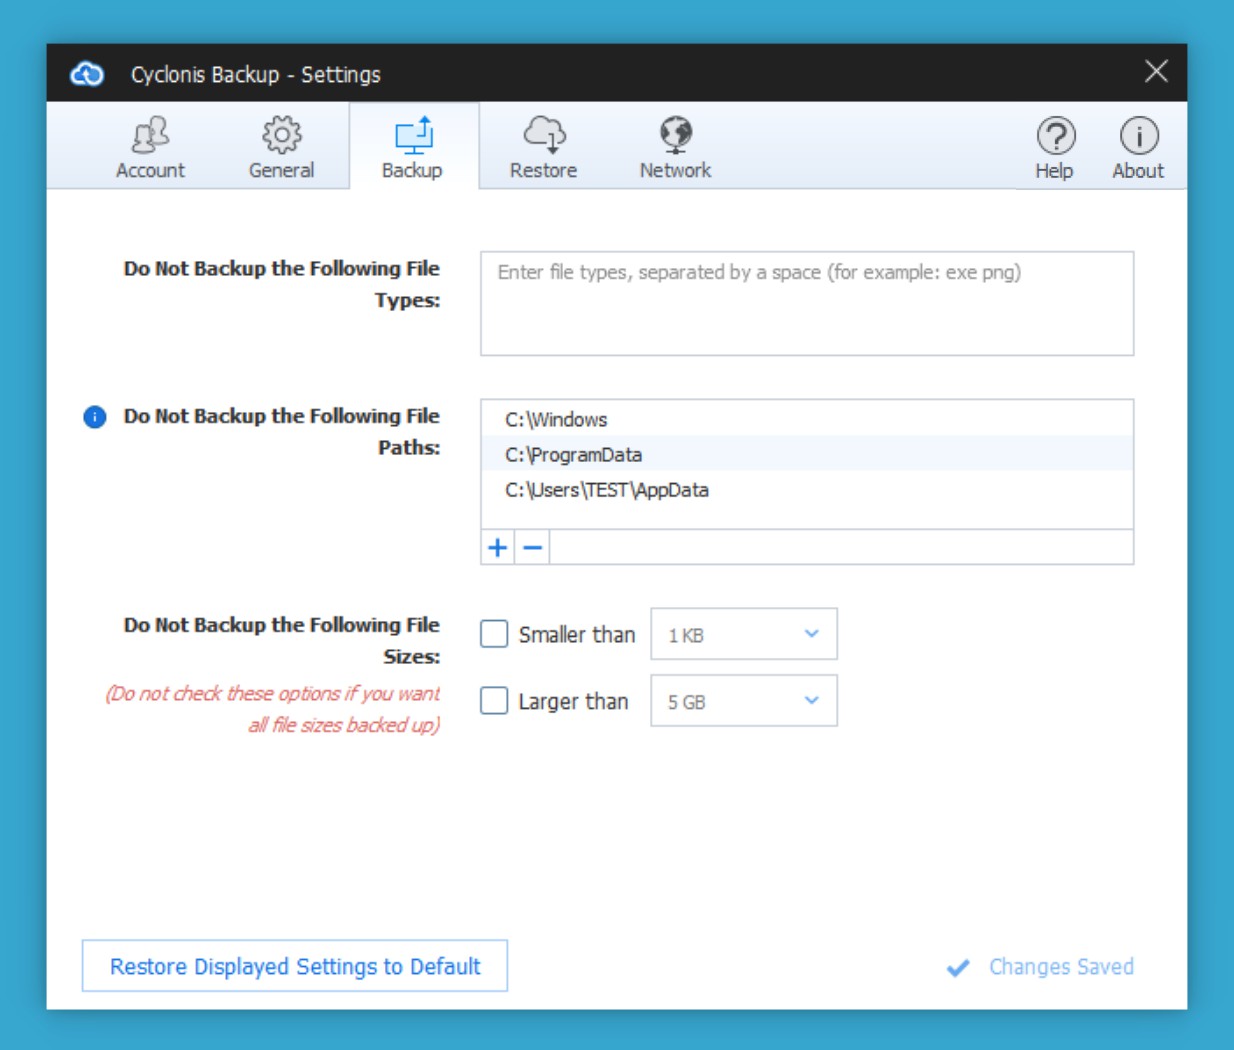
The Do Not Backup the Following File Types field lets you exclude specific file types from all of your Cyclonis Backup backups. This feature may be useful to decrease the amount of space that your backups consume and to speed up the backup process. For example, you may wish to exclude certain types of large media files or temp files based on file extension.
To exclude specific file types from your backups, click the field and type in the file extensions of the file types that you do not want to back up. You can enter multiple file extensions, separated by spaces. For example, to exclude.exe files and.mkv files, enter exe mkv.
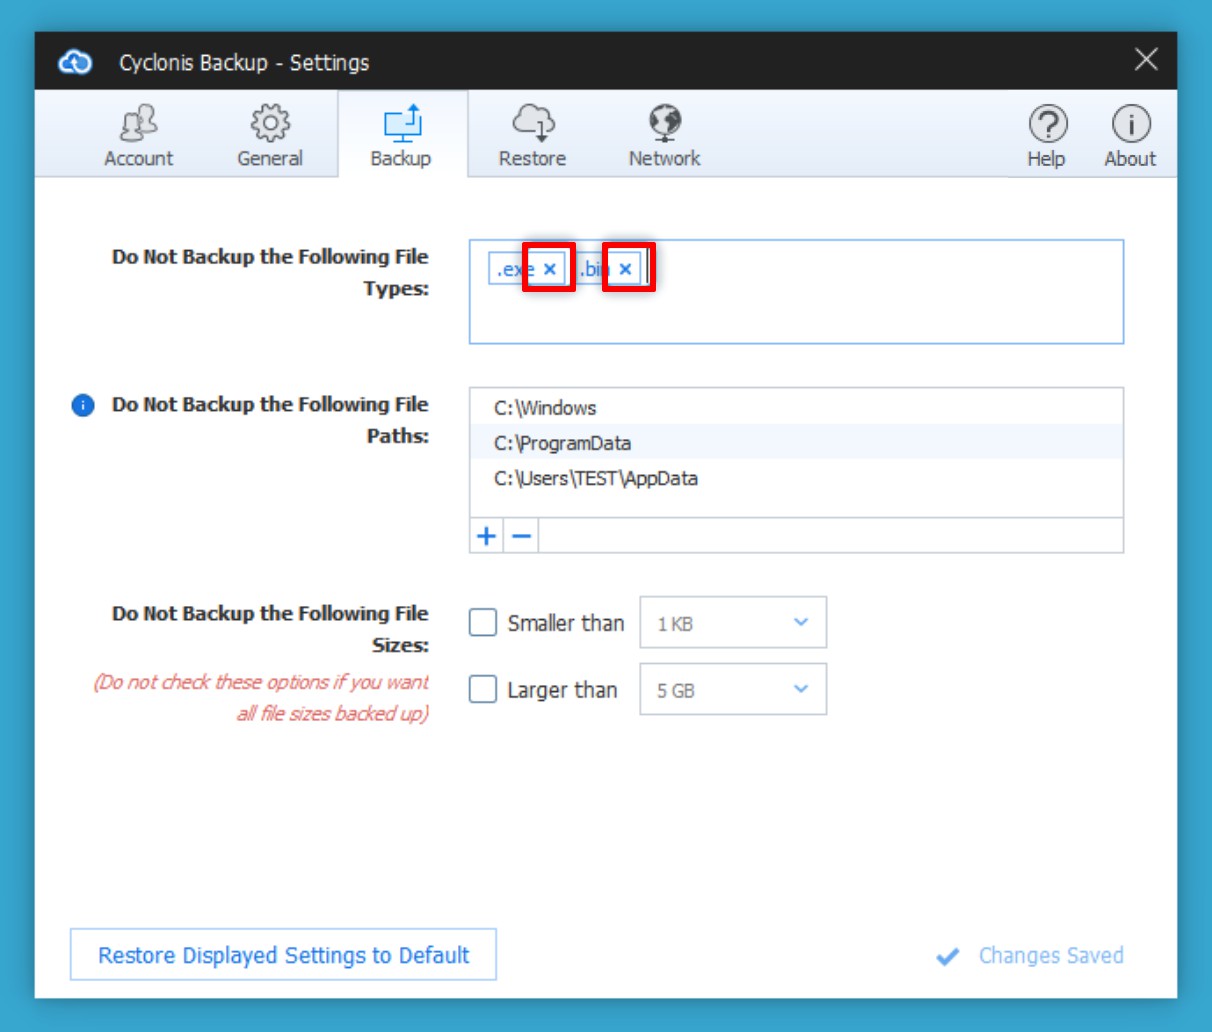
You can remove file types from the exclusion list by placing the text cursor in the field next to the file type and pressing Backspace or Delete or by clicking on the x button next to the extensions you'd like to remove from the list.
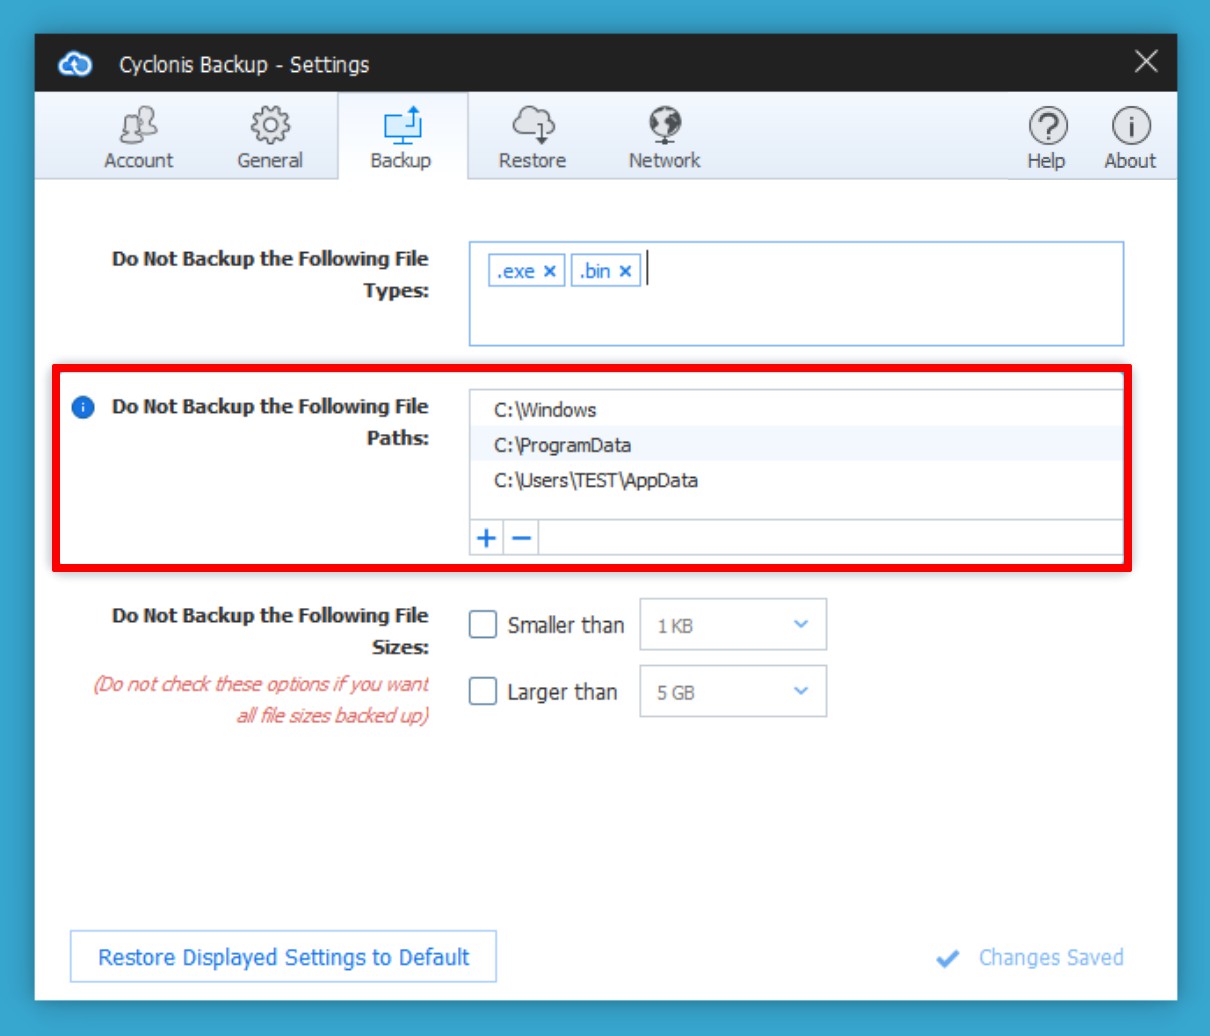
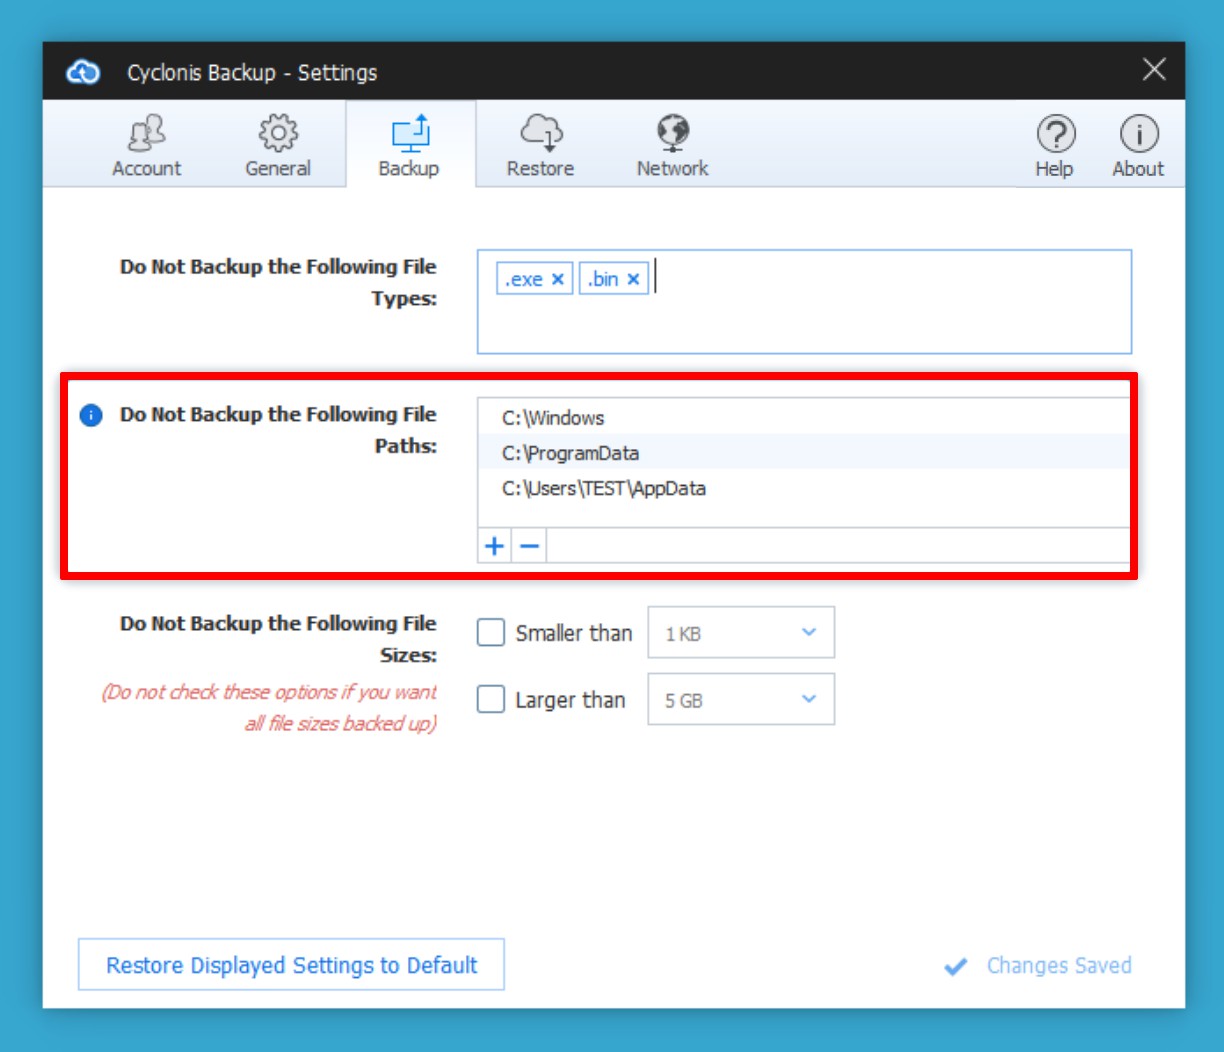
The Do Not Backup the Following File Paths list contains folders that will be excluded when Cyclonis Backup scans your hard drive to categorize files and determine which files to back up. By default, the list includes system folders that typically do not contain data requiring backup.
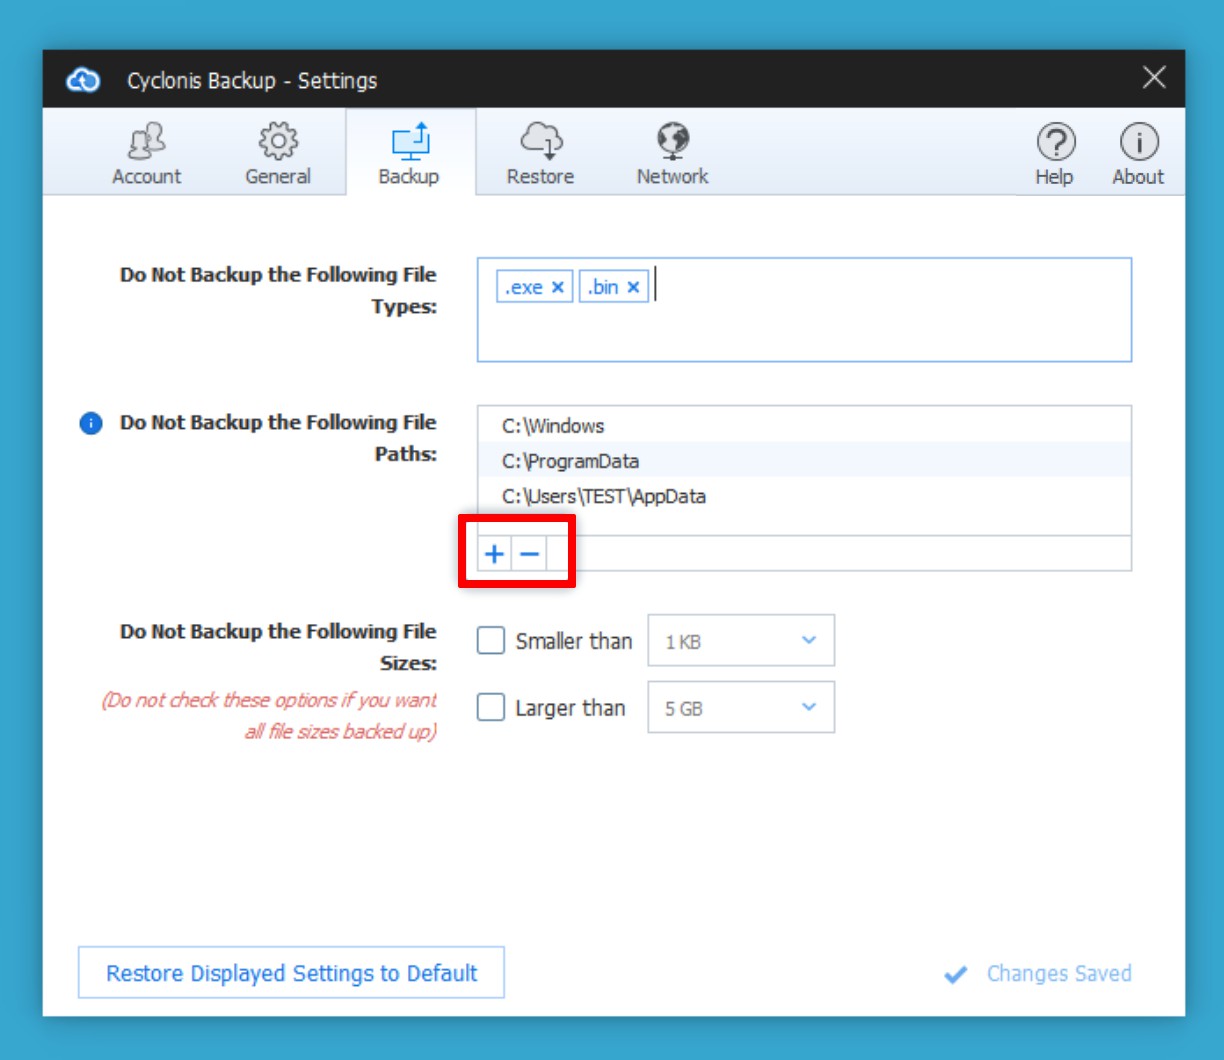
You can add additional folders to this list by clicking the + button under the list, navigating to the folder you'd like to add, and clicking Select Folder. To remove a folder from the list, select it by clicking on it once, and click the - button under the list.
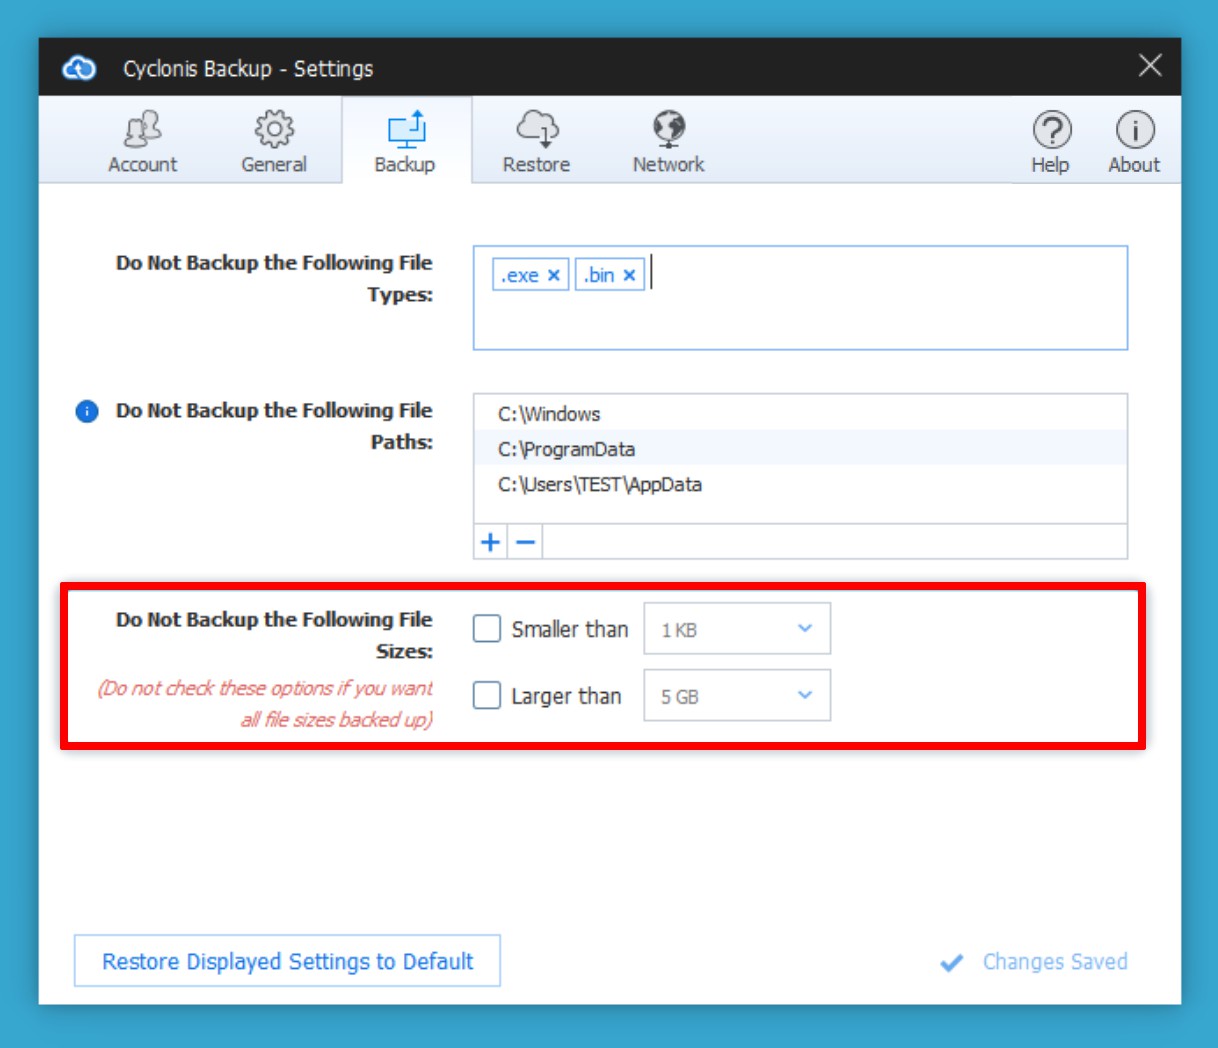
You can configure Cyclonis Backup to exclude files that are larger or smaller than a user-specified size.
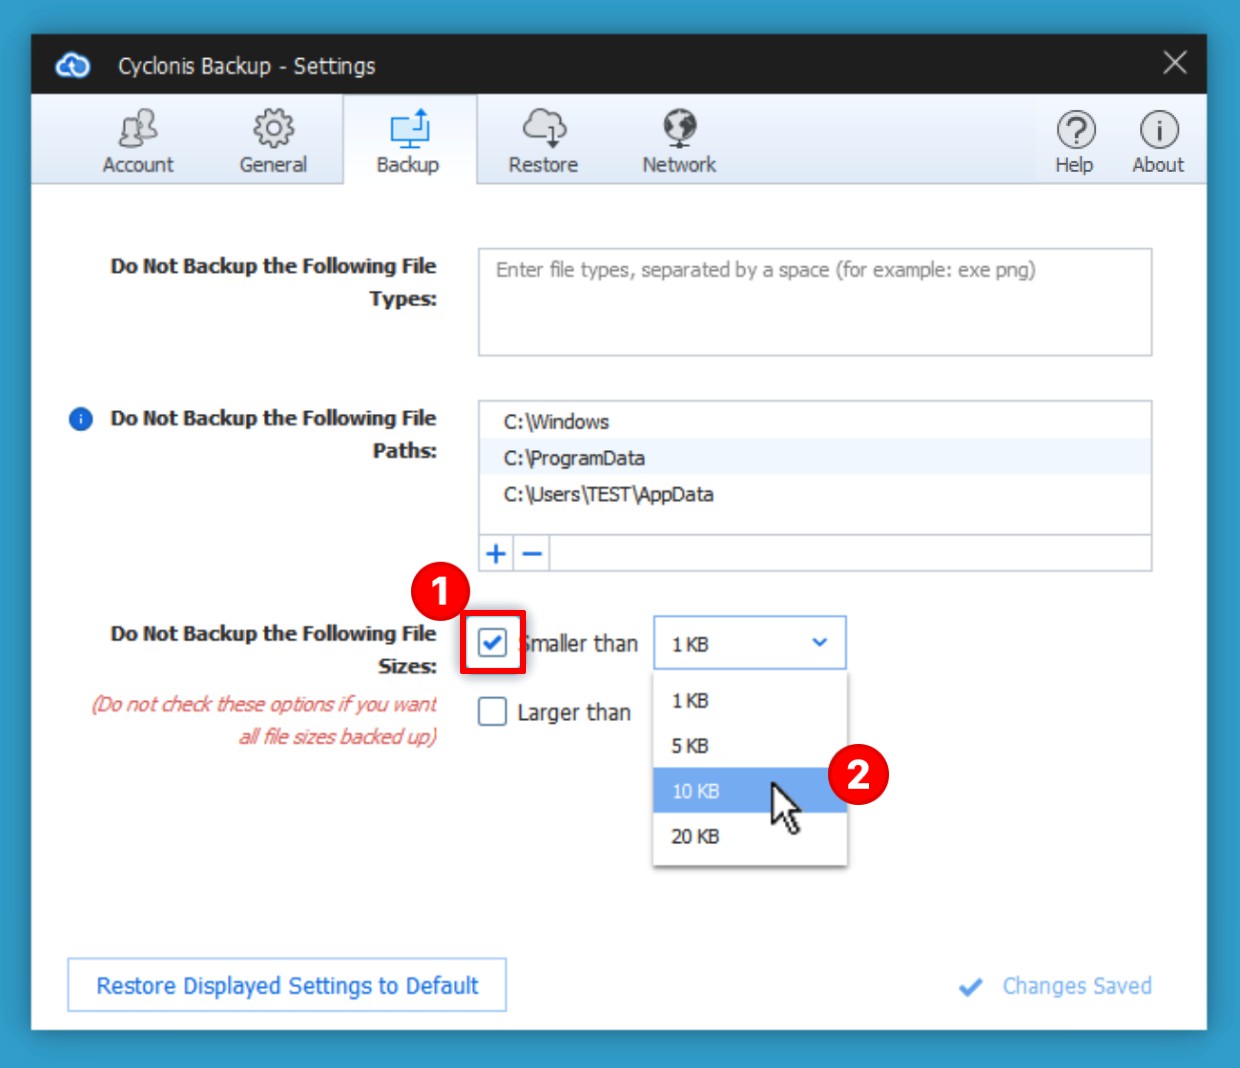
To exclude files from backup that are smaller than a specific size, check the Smaller than checkbox (1) to enable the drop-down menu next to it. You can then select a threshold file size from the drop-down menu (2). Any file smaller than the selected threshold will be excluded from backups.
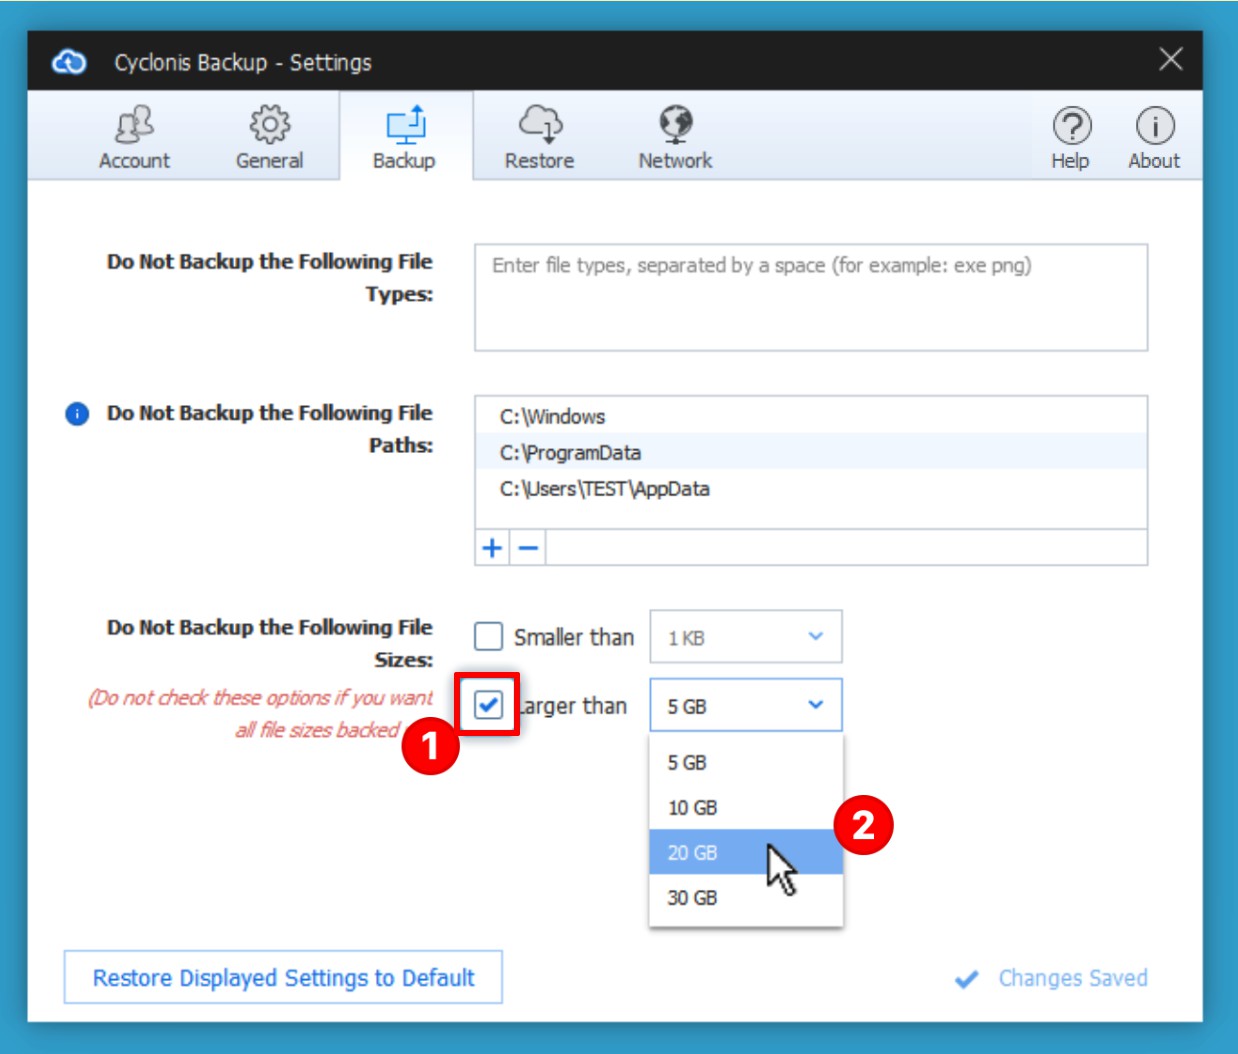
To exclude files from backup that are larger than a specific size, check the Larger than checkbox (1) to enable the drop-down menu next to it (2). You can then select a threshold file size from the drop-down menu. Any file larger than the selected threshold will be excluded from backups.
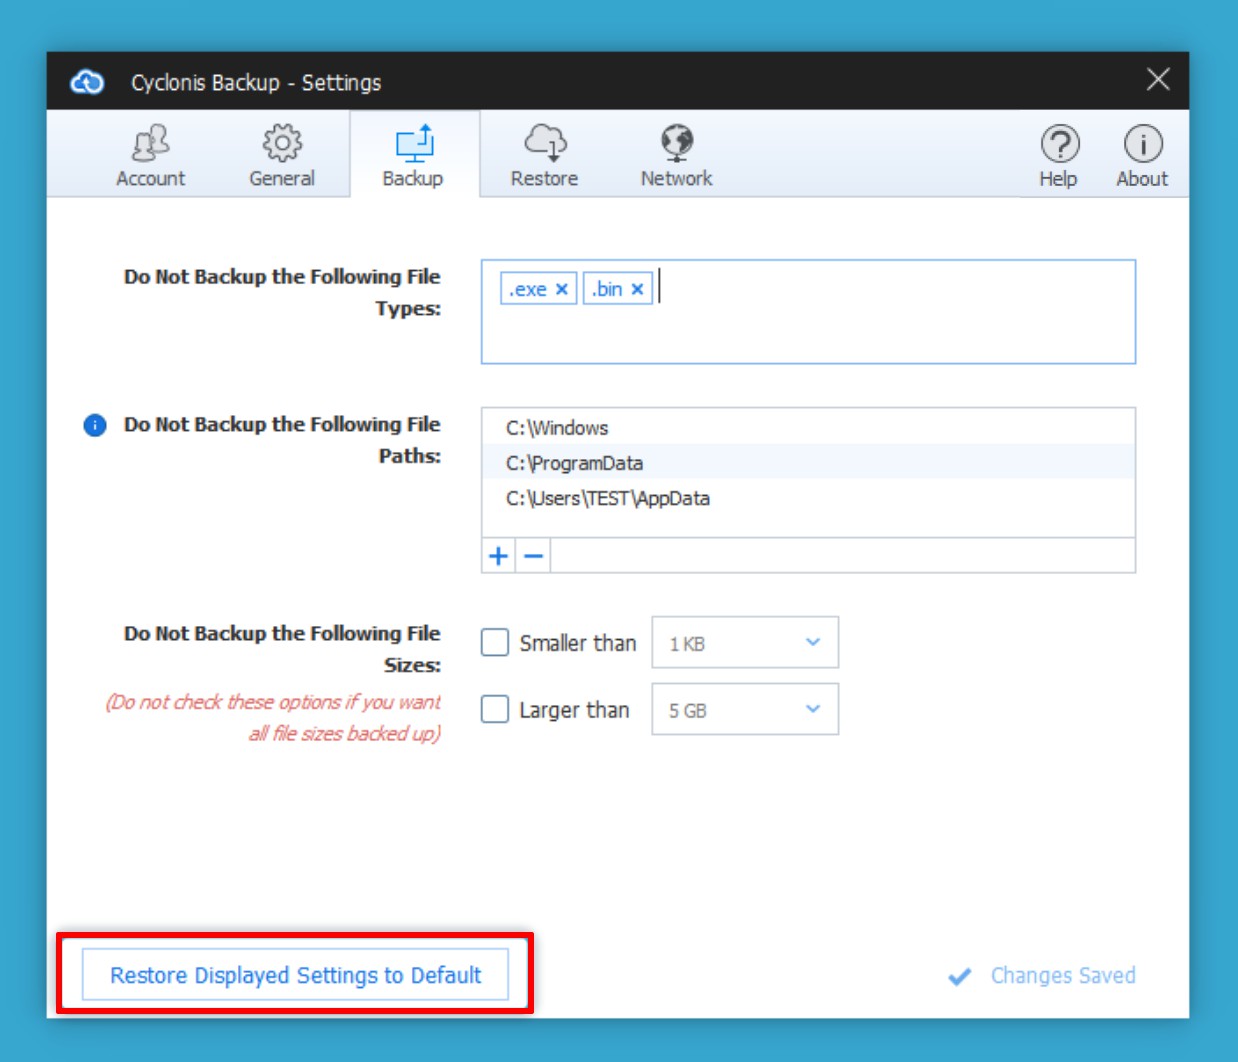
Clicking the Restore Displayed Settings to Default button will revert all the settings in the Backup tab to their default state.
- The Restore Tab
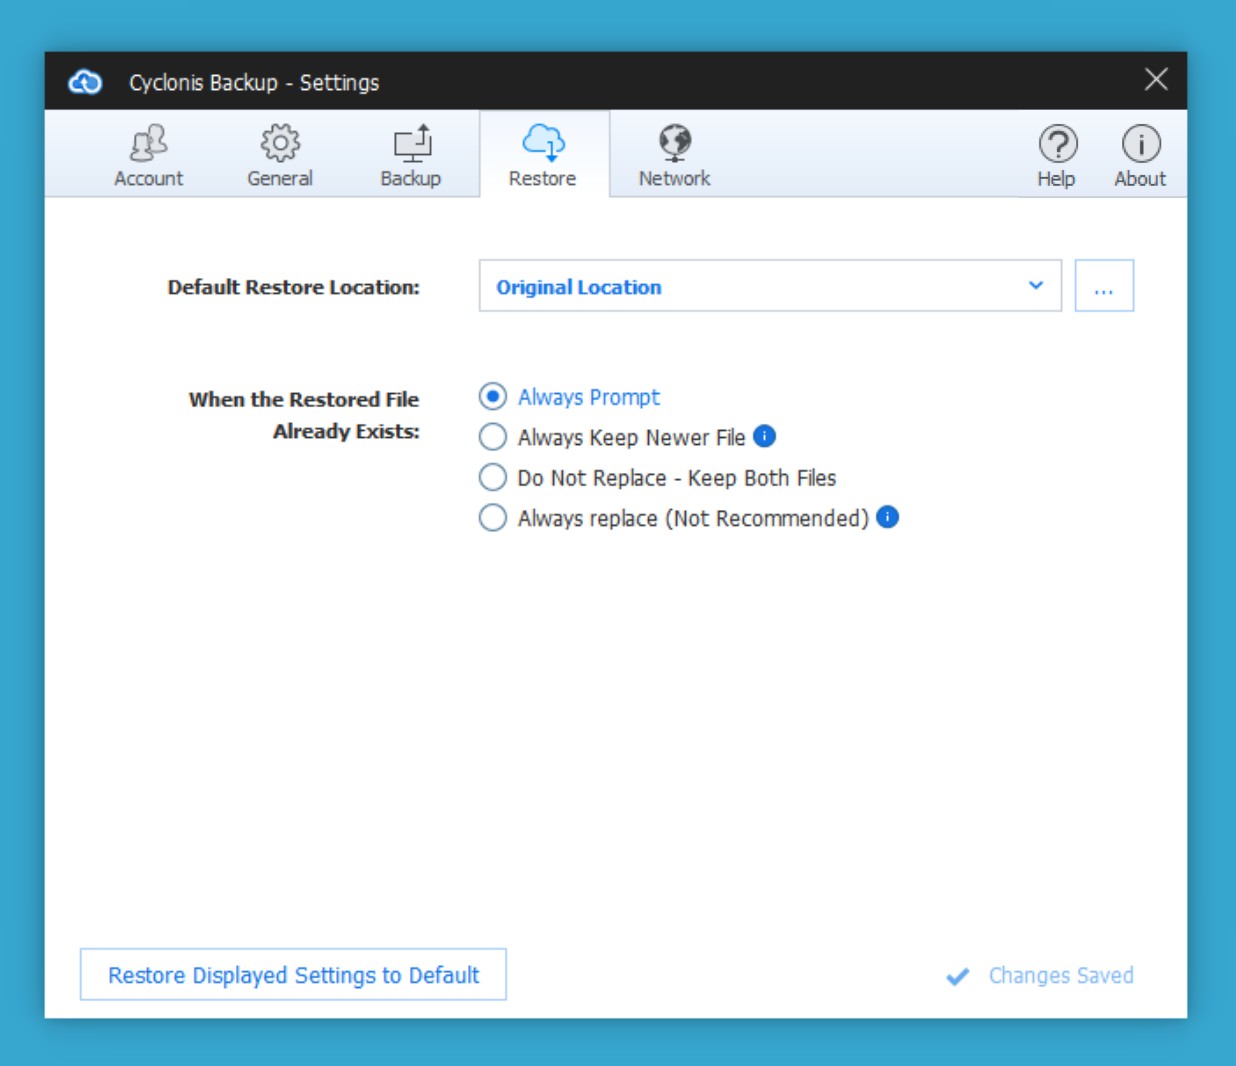
The Restore tab in the Settings window lets you customize how Cyclonis Backup restores files. You can set the default location where files will be restored. You can also configure the actions Cyclonis Backup will take when restoring files that already exist on your computer.
Default Restore Location
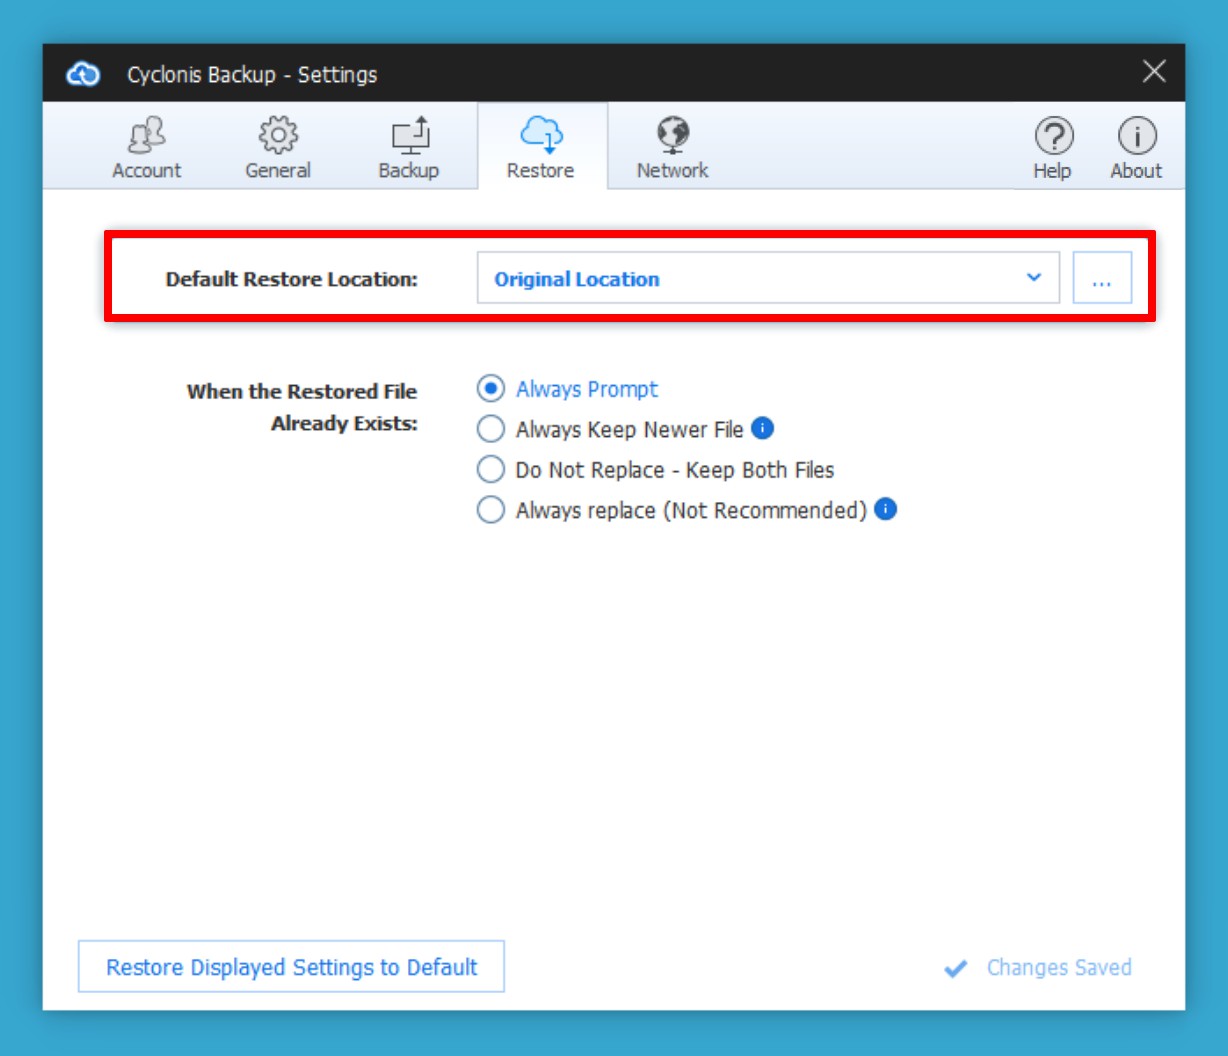
The Default Restore Location specifies the folder where your files will be restored to if you click the Restore now button during the restore process without changing any other settings.
On initial installation, the Default Restore Location is set to Original Location (i.e., if a file called document.txt was located in C:\Folder\ when it was backed up, Cyclonis Backup will try to restore to the C:\Folder\ folder).
NOTE: If the original folder does not exist, Cyclonis Backup will attempt to create it and restore files to it.
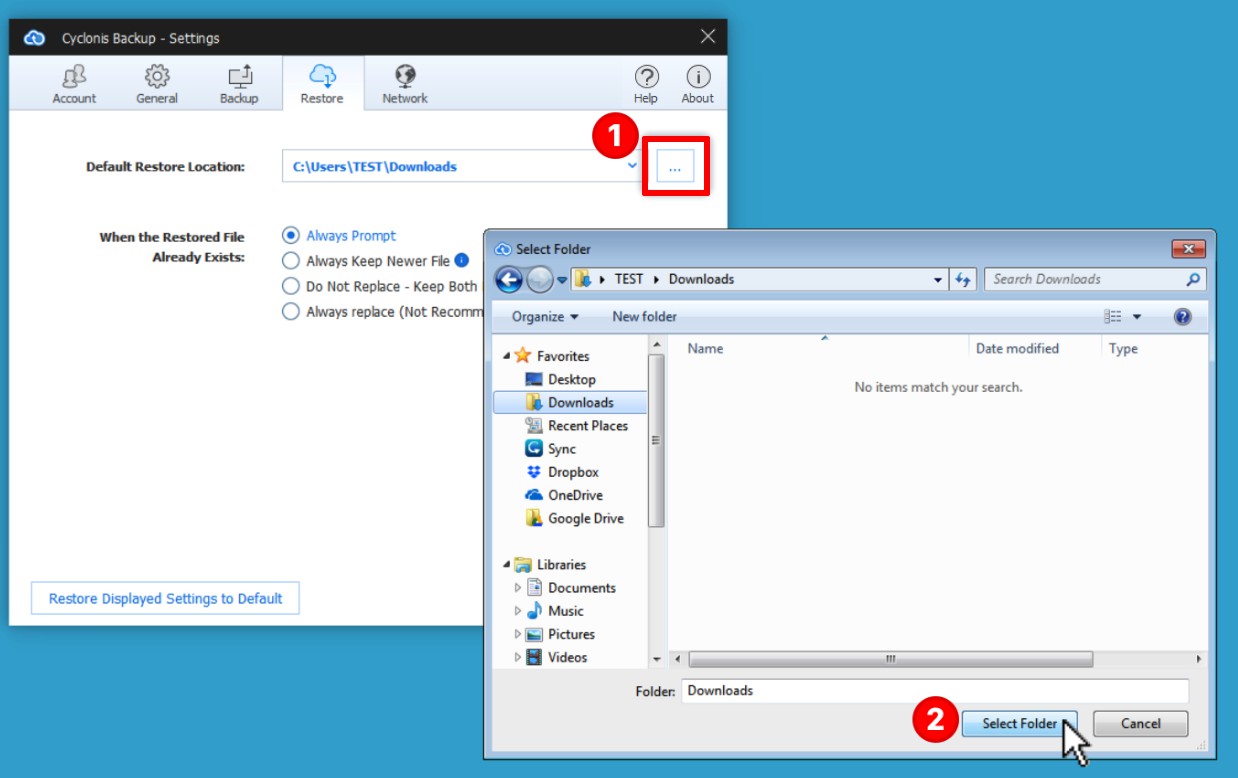
To set a different Default Restore Location, click the three-dot button  (1) and locate your desired folder.
Once you have selected your desired folder, click Select Folder (2) to set the Default Restore Location and save the setting.
If you have previously modified the Default Restore Location, the previous folders you have set will be displayed in the drop-down menu.
If any files that you are restoring from the Cloud already exist on your system, Cyclonis Backup will analyze the file(s) on your system and the backup file(s) to determine if they are identical or different. If the files are identical, Cyclonis Backup will skip the file. If the files are NOT identical, Cyclonis Backup, by default, will ask you how you would like to proceed.
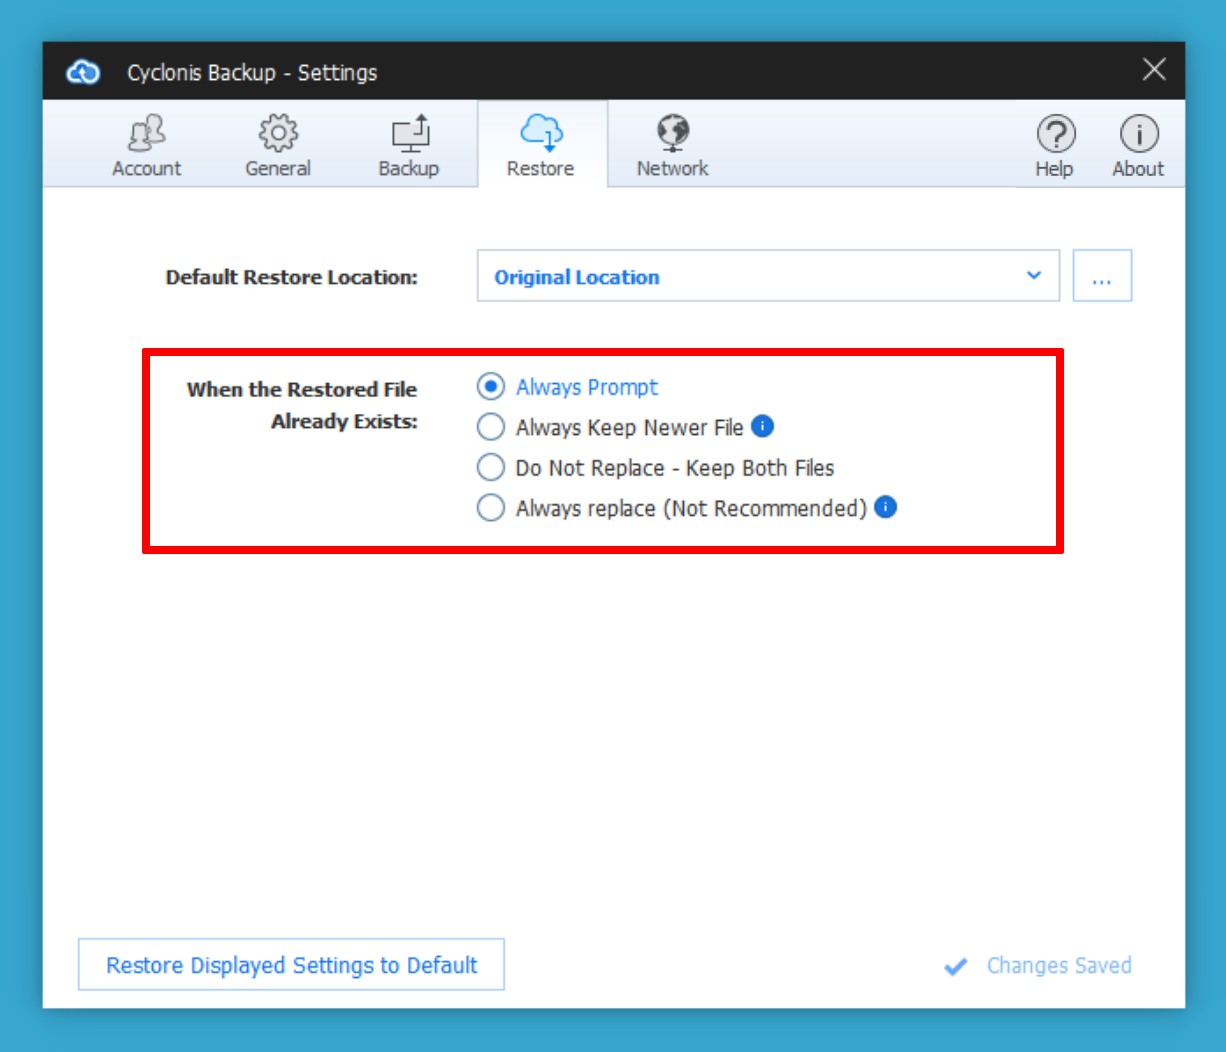
By default, Cyclonis Backup is configured to prompt you when you attempt to restore different versions of files that already exist on your system. If you wish, you can modify the default behavior via the setting When the restored file already exists. You can select from the following options:
- Always prompt – Enabled by default, this option will prompt you during each restore operation in which a different version of a file exists on your system.
- Always keep newer file – If this option is selected, Cyclonis Backup will compare the age of the local file on your system and the file being restored from backup. If the local file has been modified more recently than the file being restored, Cyclonis Backup will NOT overwrite the local file. If the file being restored from backup is newer, the local file will be overwritten.
- Do Not Replace - Keep Both Files – This is the safest option. Every time you try to restore a file that already exists on your hard drive, Cyclonis Backup will rename the existing file on your computer (placing a (1) after the file name) and restore the selected file (and version) from the cloud, saving it with its original name. If you wish, you can manually review the two files and decide which one you would like to keep (or simply keep both versions).
- Always replace (Not recommended) – If this option is enabled, Cyclonis Backup will automatically delete the local file and replace it with the backed up file that you selected without any further confirmation. Bear in mind that deleting the local file is generally NOT REVERSIBLE and using this option could lead to inadvertent data loss.
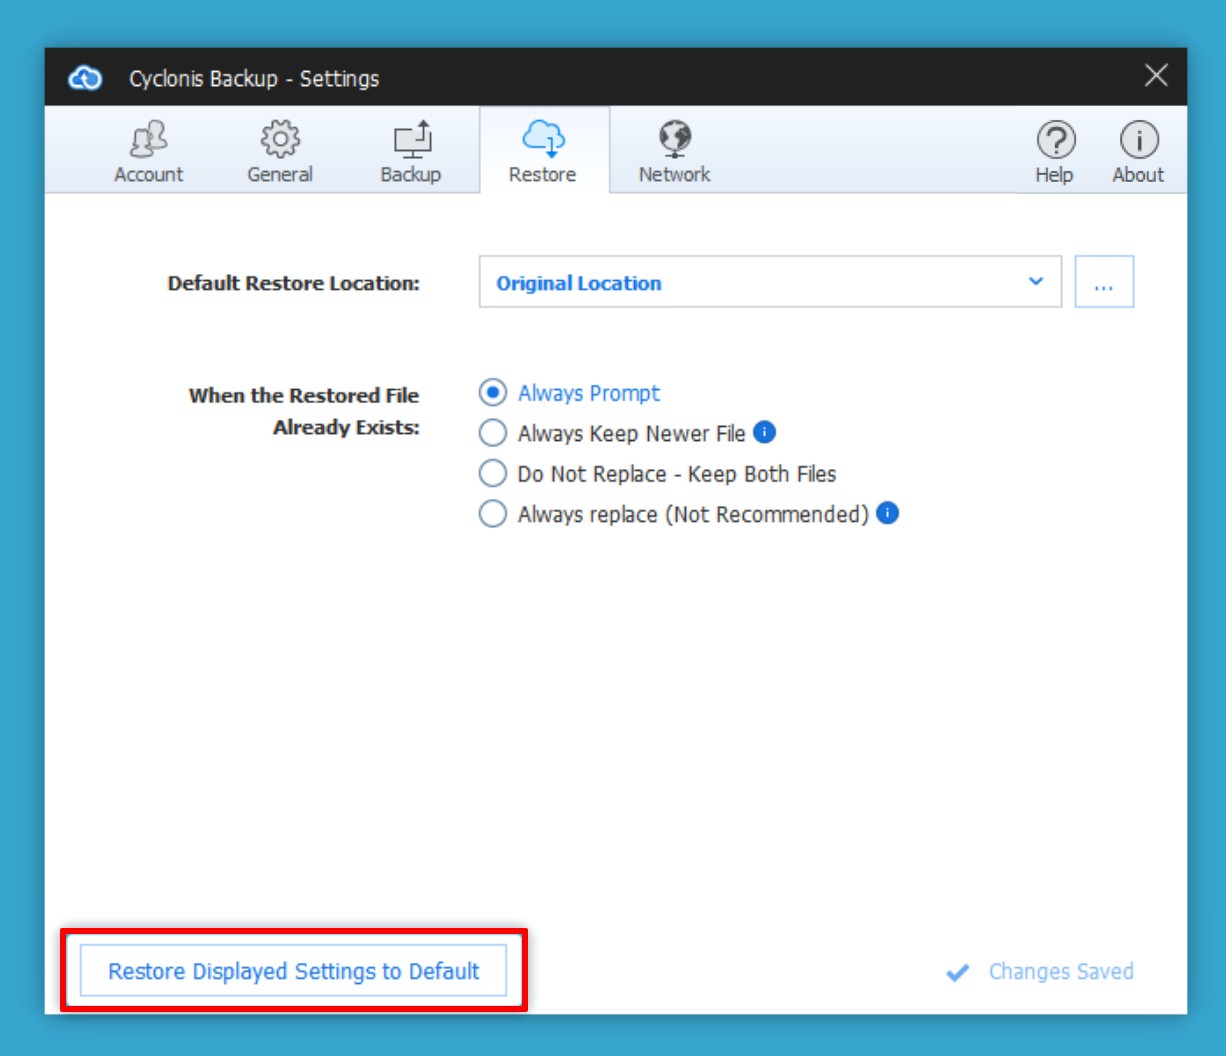
To revert all settings in the Restore tab to their default state, click the Restore Displayed Settings to Default button.
- Network Tab
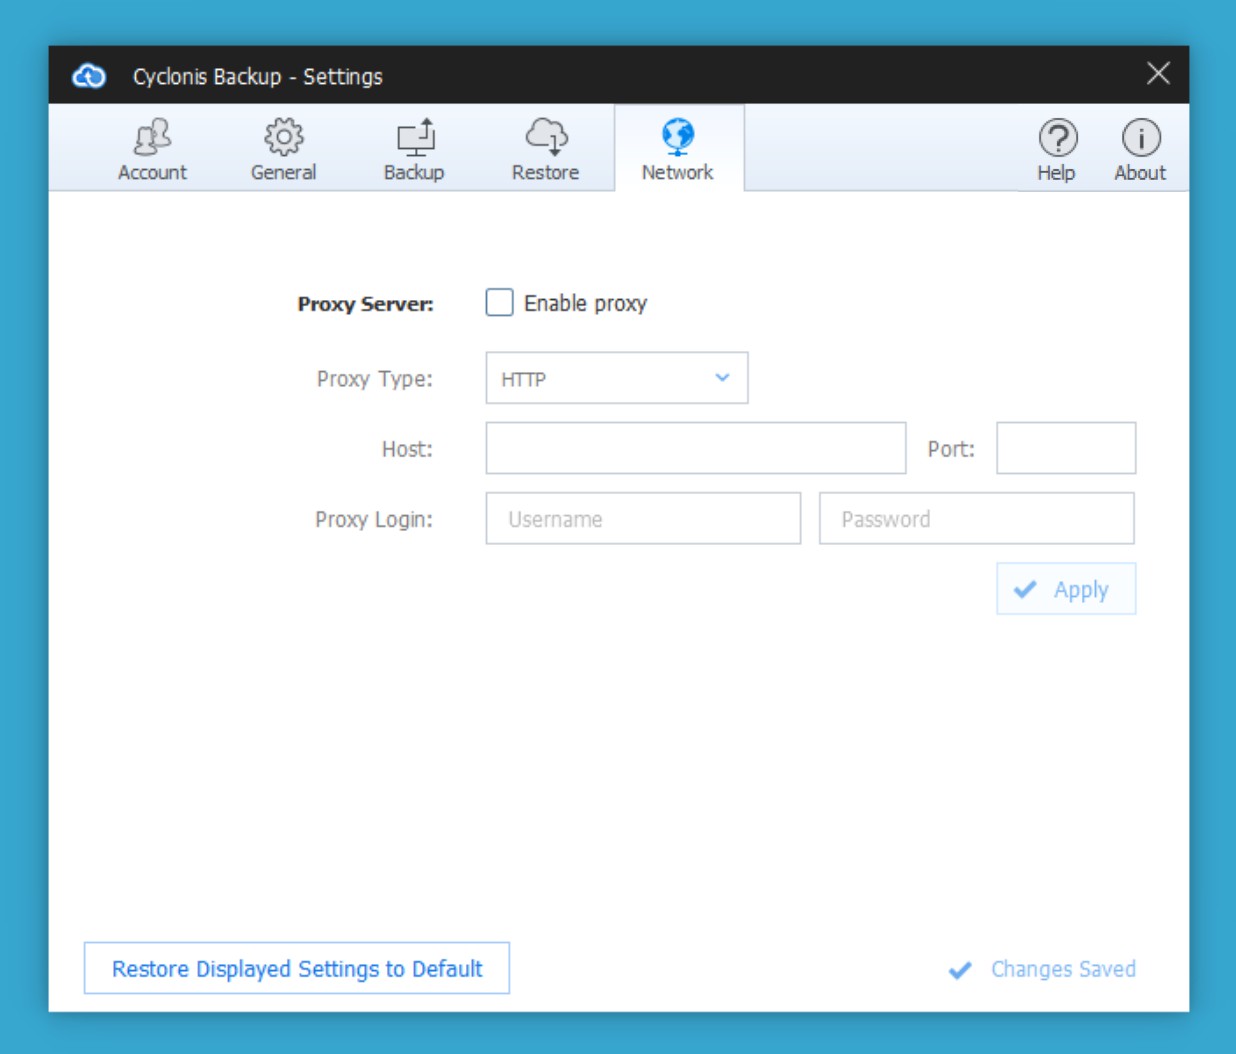
The Network tab allows you to configure how Cyclonis Backup connects to the Internet. The majority of users should not need to change these settings. Users running Cyclonis Backup behind a corporate firewall may need to modify these proxy settings.
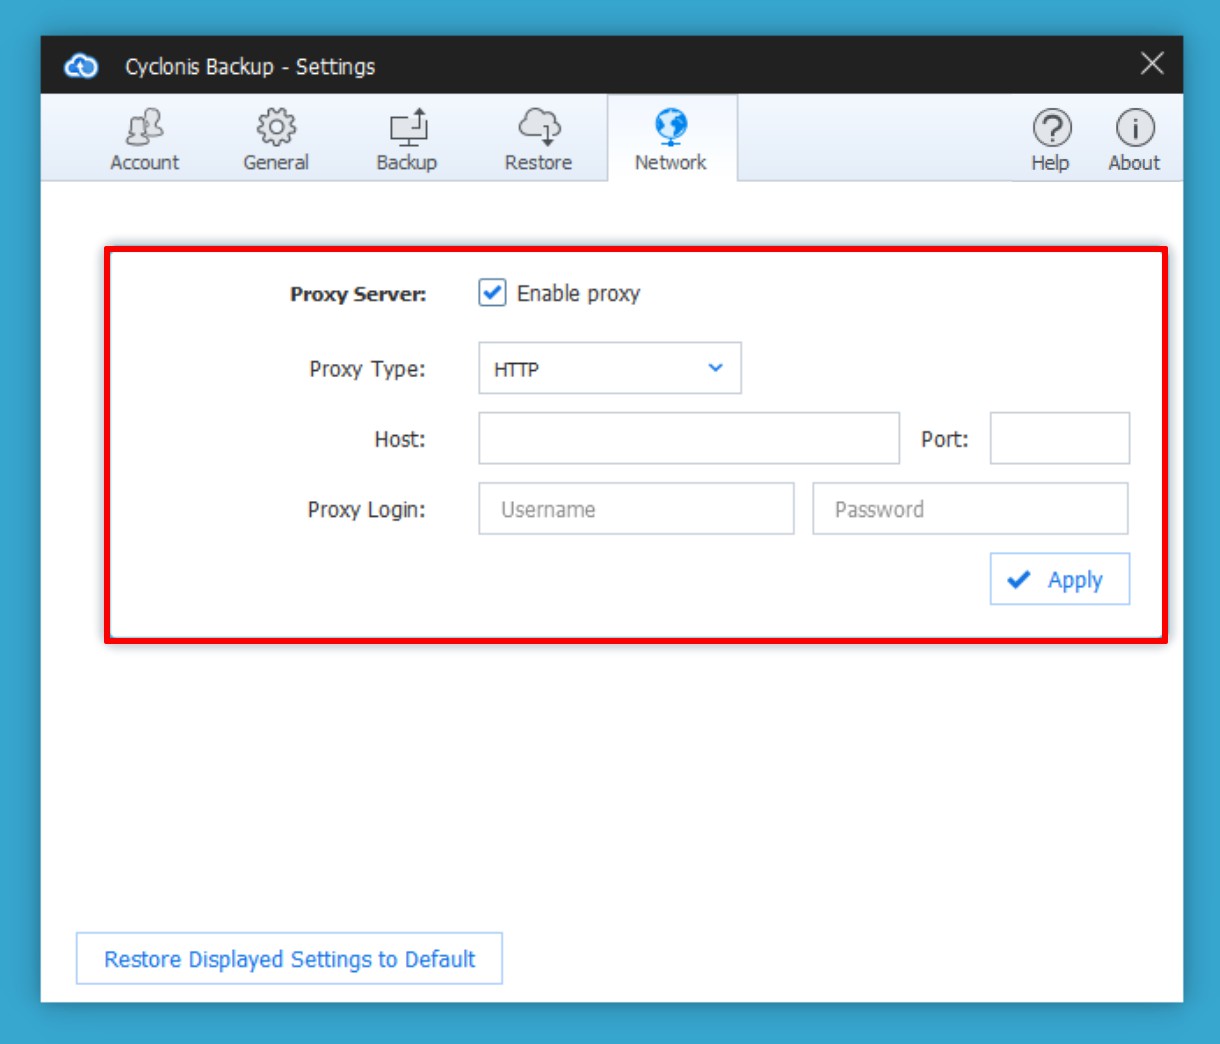
You can configure Cyclonis Backup to connect to the Internet through a proxy server. To enable a proxy server, select the Enable proxy checkbox and enter your proxy configuration details (Type, Server and Port, and Login credentials). If you are connecting to the Internet from a corporate network, you may obtain these settings from your system administrator. When you have completed the configuration, click the Apply button.
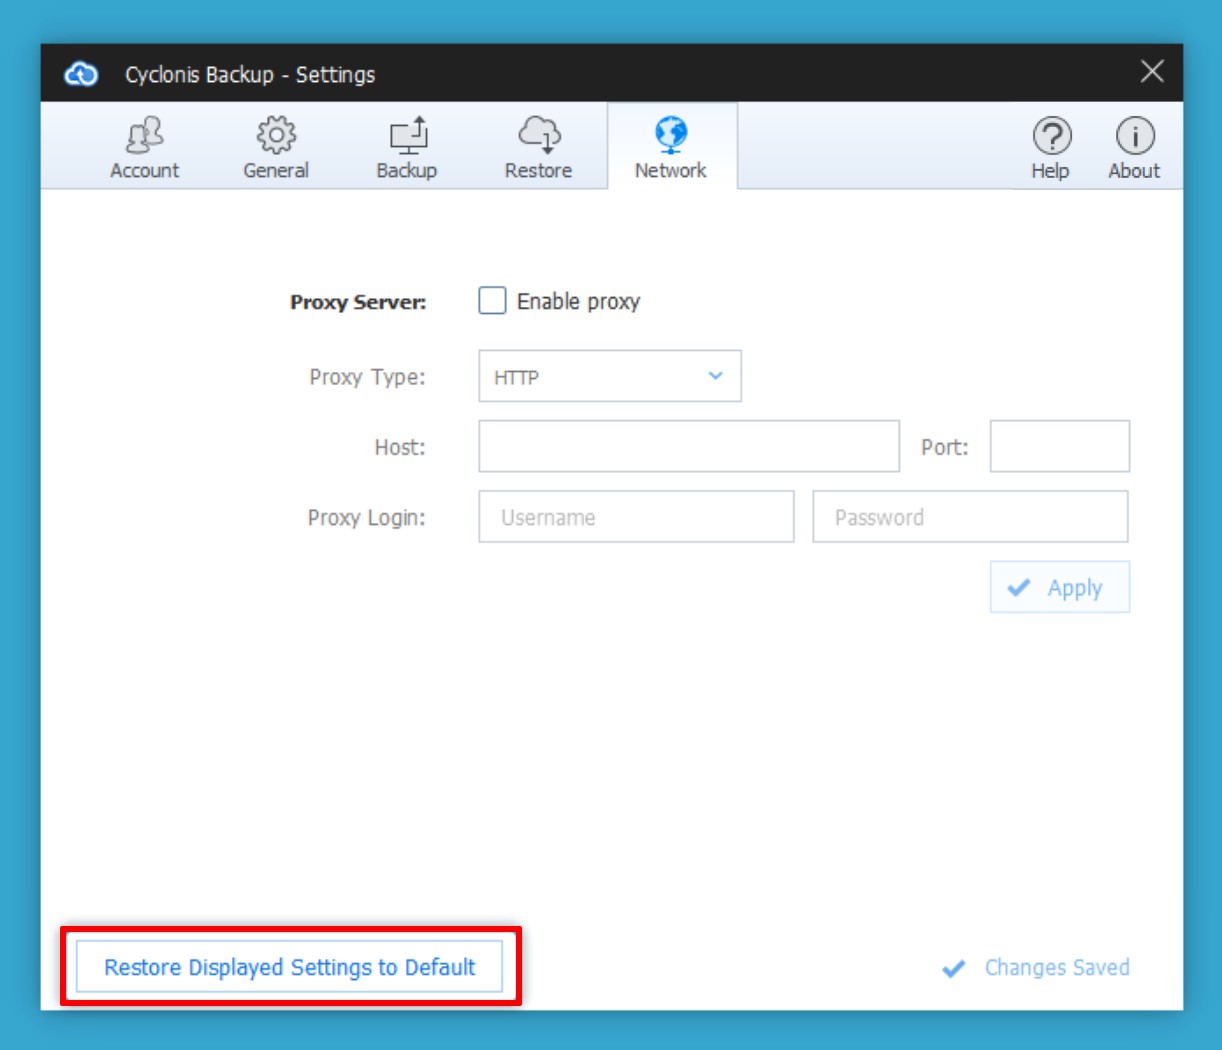
You can disable proxy connection by unchecking the Enable proxy checkbox. To revert all settings in the Network tab to their default state, click the Restore Displayed Settings to Default button.