How to Fix Corrupted Fonts in Windows
Windows fonts are easy to expand and edit, but users who tamper with them too much may end up accidentally introducing corrupted font files. Usually, you can notice this issue because certain pieces of text or symbols appear scrambled or out of place. Troubleshooting corrupted fonts in Windows is not a popular procedure, and many people might think that a fresh install is required to fix the issue. Thankfully, this is not the case! Here are some of the quick and effective ways to fix corrupted fonts in Windows.
Reset Default Font Settings
There is a fairly obscure button hidden deep inside in the Windows settings. It allows you to reset the default font settings, potentially fixes issues with corrupted Windows fonts. Keep in mind that this might not fix font issues you are experiencing in specific software or games – it is limited to fixing Windows issues.
- Go to Start Menu -> Control Panel.
- In the View By option, select Large Icons.
- Then, head to Fonts.
- Click on the Font Settings menu, and select Restore default font settings.
Fix Corrupted Fonts in Windows by Recreating the Cache
Windows keeps a neat cache of all fonts that you use. Rebuilding it is a bit of a complicated task, but it is one of the best ways to fix fonts in Windows. Here are the steps you need to follow:
- Open Start Menu -> Services
- Find the service called Windows Font Cache Service.
- Right-click it and select Properties.
- Click Stop to stop the service. This is mandatory to enable the deletion of the font cache.
- Do the same for the service called Windows Presentation Foundation Font Cache 3.0.0.0.
- Now, press Windows Button + R to bring out the Run
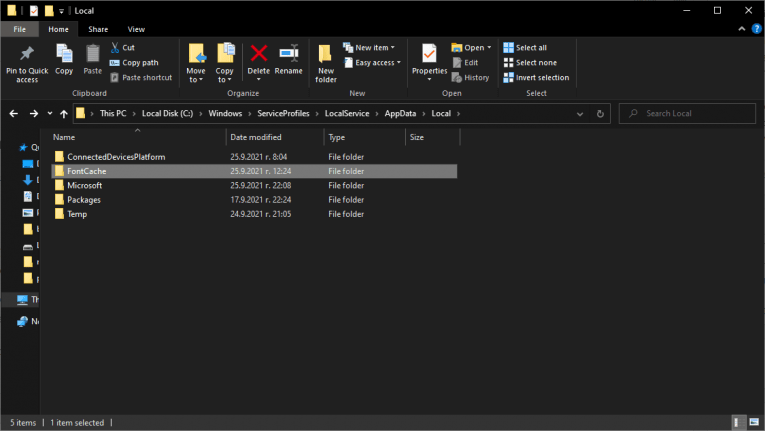
- Open the Windows Explorer and go to C:\Windows\ServiceProfiles\.
- Navigate to the directory AppData\Local\FontCache. You will see a few warnings, just press Continue.
- Delete the file 0.0.0.
- Reset your system, and use the aforementioned instructions to make sure that both services have the Running


